Copyright © 2001, David Mutch & Visionary Voyager Corp. P/L
| SIMPLE TEXT EFFECTS TUTORIAL #1 |
 |
| <-prev | INTRO | PART 1A | PART 1B | PART 2 | PART 3 | PART 4 | PART 5 | CLOSE | next-> Copyright © 2001, David Mutch & Visionary Voyager Corp. P/L |
|
|
1. Create a new image. |
|
|
2. Create a new text object and centre it to the image.. |
 |
|
3. Duplicate the object twice then reorder and rename.
|
 |
| 4. Lock the Transparency, then fill the duplicates with black and white colour respectively. Ensure that Lock Transparency is turned ON, then fill the Outer Shadow object with black and the Outer Highlight object with white. |
|
| 5. Unlock the transparency, then Emboss the original object. Unlock the Transparency. The Emboss settings I used were: Depth = 4, level = 100, angle = 135 degrees, original color. |
 |
|
6. Turn on Lock Transparency then blur the object. |
 |
|
7. Turn off Lock Transparency and blur the Outer Shadow and Outer Highlight objects. |
 |
|
8. Reposition the Outer Shadow and Outer Highlight objects |
|
|
9. To create the reverse effect: This now appears to be raised because the Outside Shadow is now facing the same direction as the shadow inside the object (created from the blurred emboss). Note that the same reversed effect could have been created by leaving the positioning of the Outer Shadow and Outer Highlight objects where they are and changing the emboss angle from 135 degrees to 315 degrees in step 6. It will appear this way as long as both inner and outer shadows (ditto for highlights) face the same direction. |
 |
COMPLEX (multi-object) METHOD Steps:
(Note: The complex method is divided into to parts corresponding to the earlier tuts shown in Parts 1B and Part 2 - the creation of the inner soft emboss effect and the creation of the outer soft bevel effect. The first part is described in steps 1 - 8 and the 2nd part in steps 9 - 11).
|
Part 1: Create the inner soft emboss effect: 1. Create a new image. |
|
|
2. Change the Paint colour to 20% Black. |
|
|
3. Create a new text object and centre it to the image. |
 |
|
4. Duplicate the object four times, reorder then rename.
|
 |
| 5. Create a mask from the original object and then invert it. If the Mask Marquee is visible you will see the 'marching ants' marquee surrounding both the character and the image border indicating that the area outside the character is selected. |
|
|
6. Fill the Inner Shadow with black and the Inner Highlight with white. |
 |
| 7. Remove the mask and apply a Gaussian blur (3 pixels) to both ' Inner' objects. Hint: Use Mask > Remove, SHIFT+CTRL+R or Hint:Use CTRL+F to repeat the last used effect for the second object. |
 |
|
8. Clip both 'Inner' objects to the original using the paper-clip icon on each of these objects in the Object Docker, then reposition them to create the inner soft emboss effect. This completes the inner soft emboss effect. |
|
|
Part 2: Create the outer soft bevel effect: 9. Lock the Transparency, then fill the Outer Shadow with black and the Outer Highlight with white. |
|
| 10. Unlock the Transparency, then apply a Gaussian Blur (3 pix) to both the Outer Shadow and Outer Highlight objects. Hint:Use CTRL+F to repeat the last used effect for the second object. |
 |
| 11. Reposition the Outer object to create the soft outer bevel. Using the arrow keys, move the Outer Shadow 3 pixels up and 3 pixels left, move the Outer highlight 2 pixels down and 2 pixels right. |
|
| To reverse the effect, change the positions of the Outer Shadow and Outer highlight around so that shadows and highlights from both inner and outer effects correspond. |  |
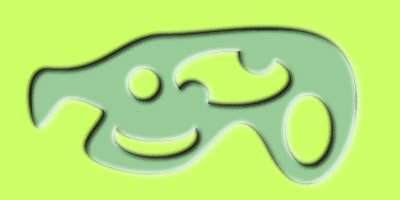
Some other examples using this effect with other objects:


|
TIPS & Notes:
|
|
<-prev | INTRO | PART 1A | PART 1B | PART 2 | PART 3 | PART 4 | PART 5 | CLOSE | next->
Copyright © 2001, David Mutch & Visionary Voyager Corp. P/L |
||||