Creating and Saving Custom Fountain Fills in Corel Photo-Paint.
Often we need to create a custom Fountain Fill and then be able to reproduce the exact same fill some time later. Here’s how:
Opening the Fountain Fill dialogue box
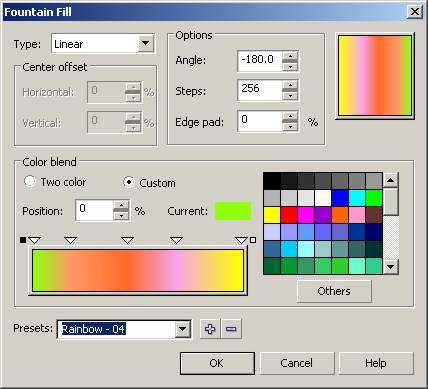
In order to create and save a custom Fountain Fill we must first open the Fountain Fill dialogue box. There are a number of different ways to open this dialogue.
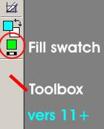
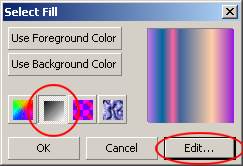
(a) double click on the Fill colour swatch to open the preliminary Select Fill dialogue box , select the Fountain Fill swatch, then press Edit
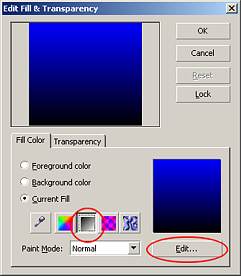
(b) from the menu choose Edit > Fill (CTRL+Backspace)to open the preliminary Edit Fill and Transparency dialogue box , select the Fountain Fill swatch, then press Edit
(c) double-click the Fill Tool to open the preliminary Edit Fill and Transparency dialogue box , select the Fountain Fill swatch, then press Edit
(d) If the Fill Tool is selected and Fountain Fill is selected on the Property bar, click the Edit Fill icon on the Property Bar to open the Fountain Fill dialogue directly.
Figs 1 a, b, c and d
Fountain Fill Dialogue Features
Presets.
For easy access to a large range of preset fills simply click the down arrow on the presets drop down list to reveal the list. Clicking on a preset’s name loads the preset and displays its name in the Presets text area.
TIP! To quickly preview presets, first choose one to load its name and then click the down arrow on the drop down list again. The selected preset’s name is highlighted. Now use your keyboard up and down arrow keys to scroll through the list and each preset will be displayed in the Preview panel at the top right of the Fountain Fill dialogue.
Physical adjustments.
Here’s a quick run down on the physical adjustments you can make in the Fountain Fill dialogue box:
- The Preview panel displays the current fill. If you drag your mouse cursor over this you will change some of the parameters of the fill, depending on the fill Type.
(Fig 2)
- Choose a fountain fill Type from the Type list box. Available types are: Linear, Radial, Conical, Square and Rectangular.
(Fig 3)
- For a Linear fill, dragging in the preview panel changes the Angle. The angle can also be adjusted using the Angle value spinner from 360 to -360 degrees.
(Fig4)
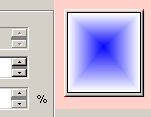
- Center Offset This adjustment allows you to se the center offset of a fill and works with all fill types except Linear. Both horizontal and vertical value spinners can be set from 100 to -100 %. For non-Linear fill types, dragging in the Preview panel changes the Center Offset values.
(Fig 5)
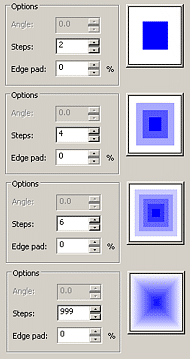
- Steps. You can choose to have up to 999 steps, making a smoother transition between fill colours. Or use only a few steps for chunky or pixilated gradients.
(Fig 6)
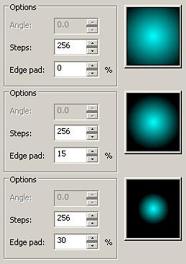
- Edge Pad. This setting allows you to adjust the size of the outer edge fill colour inwards. Edge Pad adjustment is not available for conical fills.
Fountain Fill Colour Blend Adjustments
Specify the number of transition colors by checking either Two Colour or Custom in the Color Blend area.
Two Colour Blends.
Click on the From and To colour swatches to change the colours used. Note that at the bottom of each of these drop down panels is the OTHER button which opens the full Select Color dialogue allowing you full control over your colour selection.
For linear Fills at 0 degrees the colours From-> To is left -> right.
For all other Fountain Fil types From->To is Outside to Inside.
So Edge Pad settings increases the From colour.
(Fig 8)
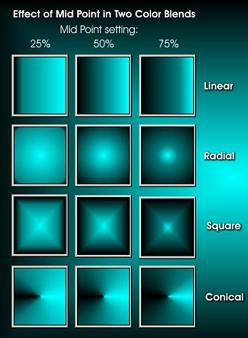
You can also adjust the Mid Point of a Two Colour fill. Drag the slider and observe the change in the Preview panel.
(Fig 9)
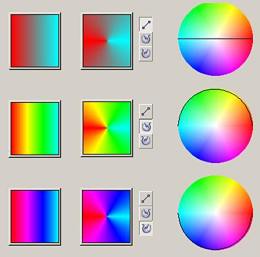
The Linear, Clockwise and Anticlockwise controls, along with the HSL Colour Wheel and its gradient thread, allow you to change and observe the way the fill is generated. Linear creates a gradient precisely from the From colour to the To colour. Selecting a Clockwise transition generates a Fill with added colours clockwise around the wheel, whicl anticlockwise generates a reverse set of transition colours.
(Fig 10)
Custom Blends
Now this is where we really get into the fun stuff about Fountain Fills.
Click the Custom radio button.
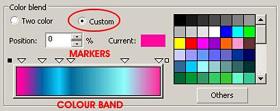
The adjustments in the Color Blend area now changes. A Position value spinner and a Current colour swatch is shown, along with a colour selection palette and most importantly, the Color Band is displayed showing the blend used in the last used custom or preset fountain fill. All of these tools are related.
The Color Band has several components: the colours in the blend itself and a Marker Strip area immediately above this showing Markers which define the position and colours used in the blend.
(Fig11)
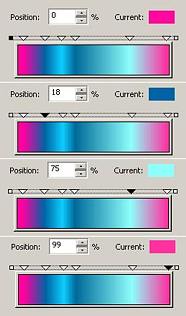
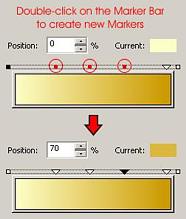
Each end of the Marker strip has a square. Between these are any number of triangular markers. Any marker can be selected. A selected marker is coloured black while unselected markers are white.
Click on each end and on some of the markers. Note that the value in the Position spinner changes and also the colour shown in the Current swatch. The Position value at the left end of the Marker strip is 0% while the position value at the right hand end is 100%. Clicking on Triangular marker between the ends reveals their specific position and colour.
(Fig 12)
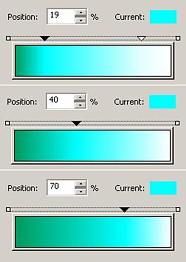
Moving Markers
Simply click on a Marker and drag it left or right to a new position. You can even pass other markers.
(Fig 13)
Deleting Markers
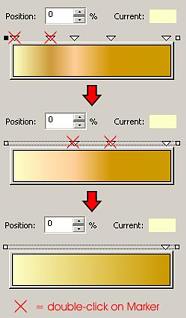
Double-click on an existing Marker to delete it.Or click on a Marker to select it then press DEL on your keyboard.
(Fig 14)
Adding Markers
Double-click anywhere in the Marker strip to create a new Marker. The current colour of the marker is auto generated from the colour at that point within the blend.
(Fig 15)
Changing a Marker's Colour
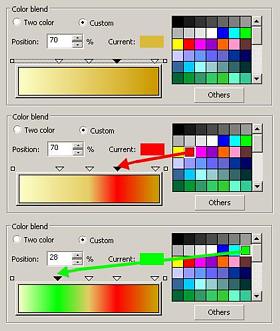
Select a Marker then click on a different colour in the Palette, or click the Others button to open the Select Colour dialogue for a complete selection range.
(Fig 16)
Custom fountain fills can contain up to 99 colours!
Creating a New Preset or Deleting an Existing Preset.
After you have created a new custom Fountain Fill you can save it as a Preset so you can reuse it again and again any time.
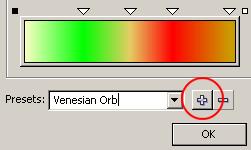
Type a name into the Presets text area and press the PLUS button (Add Fill).
(Fig 17)
The name will appear in the list in alphabetical order.
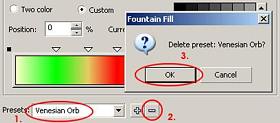
To delete a preset, simply select it from the list so that its name appears in the Preset test area then press the MINUS button (Delete Fill). A confirmation box will appear so you can back out of the deletion if you inadvertently pressed the minus button.
(Fig 18)
TIP!I often name my presets starting with “AAA”- preset name. This way they are always near the top of the alphabetically sorted list.
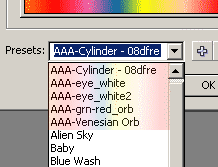
At other times I prefix my preset names with my initials, e.g. “DAM-black-grey2", or with a project identifier, e.g. JOBjones_ grey5
This way I can quickly identify and easily locate those I need for specific tasks.
Have fun creating, saving and reusing your own custom Fountain Fill Presets!
April, 2005.

